How-To: Wader Repair And Care Guide
When properly taken care of, a pair of waders will last for many years. Here are a few steps to help you get the best performance and longest life out of your waders.
Clean your Waders After Every Fishing Trip
• Hose off any salt and debris to avoid drying and caking on the waders, especially in the knees and around the boots. Saltwater is extremely corrosive on just about anything. If you use your waders in salty or brackish environments, make sure to rinse your waders off with fresh water after use, particular areas containing zippers.
• DO NOT store your wet waders balled up the back of your vehicle or in the corner of your garage – hang the waders either upside-down or lay them flat to dry
• Avoid leaving your waders in direct sunlight for prolonged periods of time. Once they are dry, move them inside. UV rays break down DWR and other waterproof finishes and can greatly reduce the life of your waders.
• If necessary, use an electric boot dryer until your waders dry
How to Clean DWR-Coated Garments
Most DWR-Coated waders can be machined washed but take the extra step to check the care instruction label on the garment. Make sure to use an additive-free powdered laundry detergent or a liquid detergent designed specifically for synthetic, breathable fabrics. Do not use any detergents that contain fabric softeners or color-safe bleach.
For machine-washable items, such as stockingfoot waders and jackets, use the following cleaning agents**:
• Ivory® Snow powdered laundry detergent
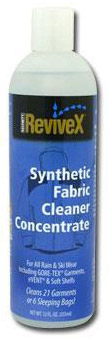
• ReviveX® Synthetic Fabric Cleaner
• Nikwax® Tech Wash
• For non-washable items, such as bootfoot waders, use Granger’s G-Wash Spray Cleaner.
**Be sure to read and follow the instructions included with your waders. Follow the manufacturer’s care and cleaning directions.
Cleaning the Inside of Your Waders
Although it’s not normally necessary, the interior of waders can collect salt and develop a funky smell over time. In the event that you need to clean the inside of your waders, follow these steps:
• Clean any dried salt, mud or other stains with a damp cloth
• DO NOT use brushes or abbrasive cloths to clean the inside of your waders!
• To help eliminate and odor in the boots, use an electric boot dryer for 45 minutes
Improper storage can cut the lifespan of of your waders. Heat will speed up the breakdown of the rubber, sunlight will eat them up fast, and damp will foster mold/bacterial growth. Follow these steps to keep your waders in top shape while they are in off-season storage.
• Inspect your waders to be sure that they are completely clean and free of salt and debris. Allow them to dry as normal.
• Store waders flat or gently folded. Allowing waders to hang by the shoulder straps can cause them to stretch, and hanging waders upside down by the boots can stress the seams where the boots are connected to the neoprene wader material.
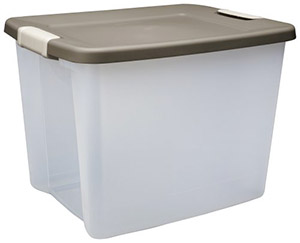
• If storing your waders flat is not possible due to storage area constraints, store your gently folded waders in a plastic tub. Leaving waders folded up can lead to creasing and create a weak points in the material so be sure to fold loosely.
• Avoid storing waders in areas of high heat, such as an attic.
Wader damage is never a welcomed sight but punctures and tears will occur especially if you are using your waders on a regular basis. These simple repair procedures will allow you to continue to enjoy your favorite pair of waders for years.
How To Repair Punctures
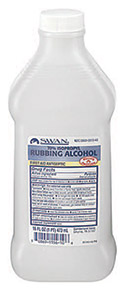
• Locate the puncture. Sometimes this is very apparent and can be visually determined quickly. However, in most cases you will have a general idea where the puncture is but aren’t sure of its exact location. The quickest way to locate the source of the puncture is to turn your waders inside out and spray the general area of the leak with rubbing alcohol. Take your hand and spread the rubbing alcohol onto the inside fabric. Turn your waders right side out and look for a dark spot to appear on the face fabric.
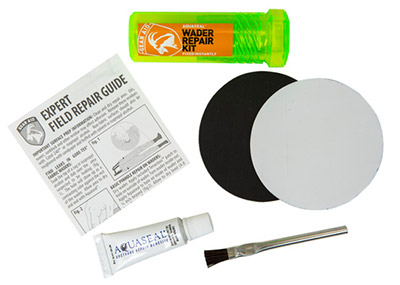
• Once located, mark the spot on both the outside and inside of the wader. At this point you will need to have either the wader repair kit that came with your waders, Aquaseal Wader Repair Kit or a tube of Aquaseal to complete the repair. Make sure the area is clean using either plain rubbing alcohol or an alcohol prep pad included in the kit.
• Apply a dab of Aquaseal to completely cover the spot and extend it for about 1/8” of an inch to the outside of the wader.
• Let it dry for about 12 hours (to speed drying time use Cotol) and repeat the process on the inside.
• For larger punctures or punctures in high wear areas, apply a second coating of Aquaseal over the initial application. Be sure to extend the second coat 1/8” beyond the edge of the first application so that it can adequately bond to the wader.
• Temporary repairs of puncture leaks can be made utilizing UV Cure Aquaseal Wader Patch 1L9L which cures in a few minutes with exposure to UV light (sunlight). However, this product is not durable enough to serve as a permanent fix. If you are out fishing and can locate a puncture leak, then this product can have you fishing again in 15 minutes and will hold up until you are able to affect a more permanent repair with regular Aquaseal.
How To Repair Tears
If you tear your waders, the repair process is slightly different than a puncture. Locating the tear isn’t an issue, but you will need to stabilize the area by applying some tape to the inside of the wader. Some wader repair kits include tape, but common duct tape will work if repair tape isn’t available.
• Prepare the tear for seal and apply the tape to the inside of the wader being sure to match the two sides of the tear together neatly.
• Clean the area with alcohol and then apply enough Aquaseal to completely cover the tear and overlap by 1/8 of an inch.
• Allow to dry for about 12 hours. Remove the tape from the inside of the wader and clean the area with alcohol to remove any residue left by the tape. Repeat the Aquaseal application on the inside of the wader.
• For larger tears or tears in high stress areas, apply a second coating of Aquaseal over the initial application. Be sure to extend the second coat 1/8” beyond the edge of the first application so that it can adequately bond to the wader.
• The waterproof tape included in some wader repair kits Kit will facilitate a temporary repair in the field, but is not durable enough for a permanent repair.
DWR Coating Restoration
Cleaning alone may not restore the DWR coating’s effectiveness. For a clean garment, use a cool iron or tumble dry on low to medium heat to reactivate the coating. Please follow the garment manufacturer’s recommended instructions for drying.
The following products are designed to restore a DWR coating. Please be sure to read and follow the instructions carefully.
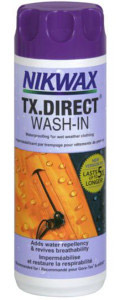
• Nikwax® TX-Direct
• McNett Revivex® Spray-On Water Repellent
• With basic care and maintenance, your waterproof, breathable garment(s) should provide you years of use and enjoyment.
To learn more about wader repair and care, checkout Orvis.com
6 on “How-To: Wader Repair And Care Guide”
-
Eric Jenkins I saw in your breathable wader repair section that there was no mention of seams leaking and how correct the issue. I have a pair of frog togs that have only seen one season of use for about 15 trips last season and first trip out this season low and behold a seam leaking in the worst possible spot in cold water (lol) the four way intersection has started to leak. Can this be repaired or trash them and purchase new ?
-
Ed Giordano Eric,
Seams can be tricky. If the waders are out of warranty, you might want to try either Aquaseal or Gear Aid Seam Grip.
-
-
Buford Lyod My waders are leaking where the breathable fabric and neoprene foot are seamed together. How would you repair this?
-
Ed Giordano Bufort,
If your waders are no longer covered by warranty, Aquaseal should do the trick.
The 18-minute mark in this video demonstrates an easy to follow how-to:
https://www.youtube.com/watch?v=ArpBgy1lAdUNOTE: If your waders are still covered by a warranty, please be sure to check with the manufacturer to ensure that your repair will not void the warranty.
~Ed
-
-
Ty What if I have a lot of little punctures? Like they look like a Dalmatian
-
CJ Id recommend a product called fixmytear. It’s a repair tape which sticks very well to vinyl, canvas and most other surfaces. Absolutely life saving tape.
https://www.amazon.com/Fixmytear-Magic-Repair-Tape-33ft/dp/B01MA5HSNC
https://www.amazon.com/fixmytear-Magic-Repair-Tape-Kit/dp/B016M1S1GU
Leave a Reply